
Introduction to Customer Statements
Managing your business’s financial health is a crucial aspect of your day-to-day operations. One essential part of this process is sending customer statements, which provide your clients with a clear summary of their outstanding invoices. QuickBooks Online simplifies this task, making it easy and efficient. In this article, we’ll walk you through some easy steps to create and send customer statements in QuickBooks Online, ensuring a seamless and professional experience for your clients.
Note: Make sure your Custom Form Styles under name Standard & Form Type (Default) are setup w/ company logo and address as the statement pulls information from that section to print on the statements.
Create a customer statement
- Go to Customers.
- Select the customer you want to make statements for.
- Select the New Transaction ▼ dropdown, then select Statement.
- Review the customer’s email address, then select Save and close.
Note: You can download your customer’s statement by selecting Print or Preview, then selecting Download. The file will be downloaded to your computer in a PDF format.
Create multiple statements for your customers
- Go to Customers.
- Select the checkboxes for the customers you want to make statements for.
- In the Batch actions dropdown ▼, select Create statements or +New icon, OTHER column then Statement
- In the Statement Type dropdown ▼, select the customer statement type:
- Balance Forward: Lists invoices and payments with outstanding balances for a specific date range.
- Open Item: Lists all open, unpaid invoices from the last 365 days.
- Transaction Statement: Lists all transactions for the selected date range.
- Select the date range from the Date ▼ dropdown.
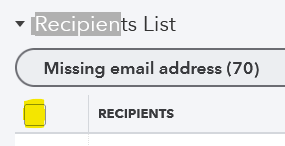
- Under Recipients List
- Review the customer’s email address(es) if any are missing or incorrect you update if needed.
- It’s defaulted to have all clients selected, you can select certain clients or all by clicking box on left next to Recipients (see screen shot below).
- Select Save, Save and close, Save and send, or Print or Preview.
Tip: If you make changes to a transaction on a statement, the statement will automatically update to match.
View current customer statements
- Go to Customers.
- Select the customer you want to see the statement for and go to the Statements tab.
- Select the date range from the Date ▼ dropdown.
To delete a statement, open it and select the Delete option.
Customize your statements
There are a few customization options for statements:
- Go to Settings ⚙ and select Account and settings.
- Select the Sales tab and go to the Statements section.
- Select Edit ✎.
- Select List each transaction as a single line or List each transaction including all detail lines.
- Select the Show aging table at bottom of statement option.
- Select Save and Done.
Conclusion
Streamline Your Financial Operations with QuickBooks Online
Creating and sending customer statements in QuickBooks Online is a straightforward process that can save you time and help maintain healthy cash flow. These easy steps will ensure that you provide your clients with accurate, professional, and well-timed statements.
At BMR Consulting, we’re here to support you in your financial management journey. Whether you need assistance with QuickBooks Online setup, training, or ongoing financial consulting, our team of experts is ready to help.
Ready to take your financial management to the next level? Contact BMR Consulting today, and let us guide you to success.
